
4 Easy & Immediate Changes to Reduce Your Back Pain & Improve Your Athleticism
It's so easy you won't believe me...until you try it


Last week you laid down a core foundation, literally, from which we can now build. We covered the beginning basics of how to contract your core to best stabilize your spine for simple movements.
We’ll still be in foundation land today, but we’ll work on applying your new core skills to a few more movements.
These movements are basic movements we perform all the time. If you’re in pain and can barely move, these are critical skills for you! You have to learn how to make your daily movements pain-free or as close as possible to pain-free.
The more movements you make painless, the quicker you will overcome your ailments.
If you’re athletic and think this isn’t for you, think again. If you’re serious about your athleticism, then you should care about how you move throughout the entire day. Moving well with basic movements will not only engrain better movement skills that you can use in your activities, but it will also save your physical capacity for your activities.
Dr. Stuart McGill uses a great analogy of a bank account. Moving well throughout the day puts money into your bank account of physical capacity. You can then withdraw from this full account when it comes time to invest during your activity of choice.
If you move poorly throughout the day, you use up a lot of your tissue’s capacity for load. You’re withdrawing from your body’s capacity bank. When it’s “go time”, you have very little earnings left to pull from, making you less athletic and more prone to injury.
Whether you’re in debilitating pain or trying to win a world championship, you need to be intentional with your everyday movements. This article is absolutely connected to my article two weeks prior. We’re just adding a few more movements for you to practice and perfect.
#1: The Log Roll. Yes, You’re Going to Learn How to Get Out of Bed.
Have you ever heard that odd saying that we’re taller in the morning and shorter in the evening? Well, it’s true, by about 1cm. It’s because of a process referred to as diurnal variation. The discs in your spine fill with fluid as you lie down because gravity is no longer compressing them.
During the day, gravity pushes down and shoves fluid out. It’s how the discs in your spine exchange water and nutrients just like every tissue in your body needs to do.
First thing in the morning your discs are filled with the most fluid they will have that day. This increases the stress these discs can take on as you move about, especially for the first hour.
That just means you need to be really intentional with your movements that first hour of the day. Not scared or slow, but intentional.
If you want your back to feel better and stronger, it’s best to start the day right. And the very first thing you do, hopefully before checking your phone, is clamber out of bed.
If you sit up straight from your back or twist and flop out of the covers like a beached salmon, you’re already taking withdraws from your spine capacity bank for the day. You and your spine deserve better.
The log roll is simple and will allow you to keep your spine centered in a good position while you transition from unconscious to early morning groggy mode.
The goal is to keep the core lightly braced and your shoulders squarely over your hips throughout the movement. Then we want to use the push of your arms and the momentum of your falling legs to power you up from lying to sitting.
Rather than describe the whole thing, let’s just do a video this time.
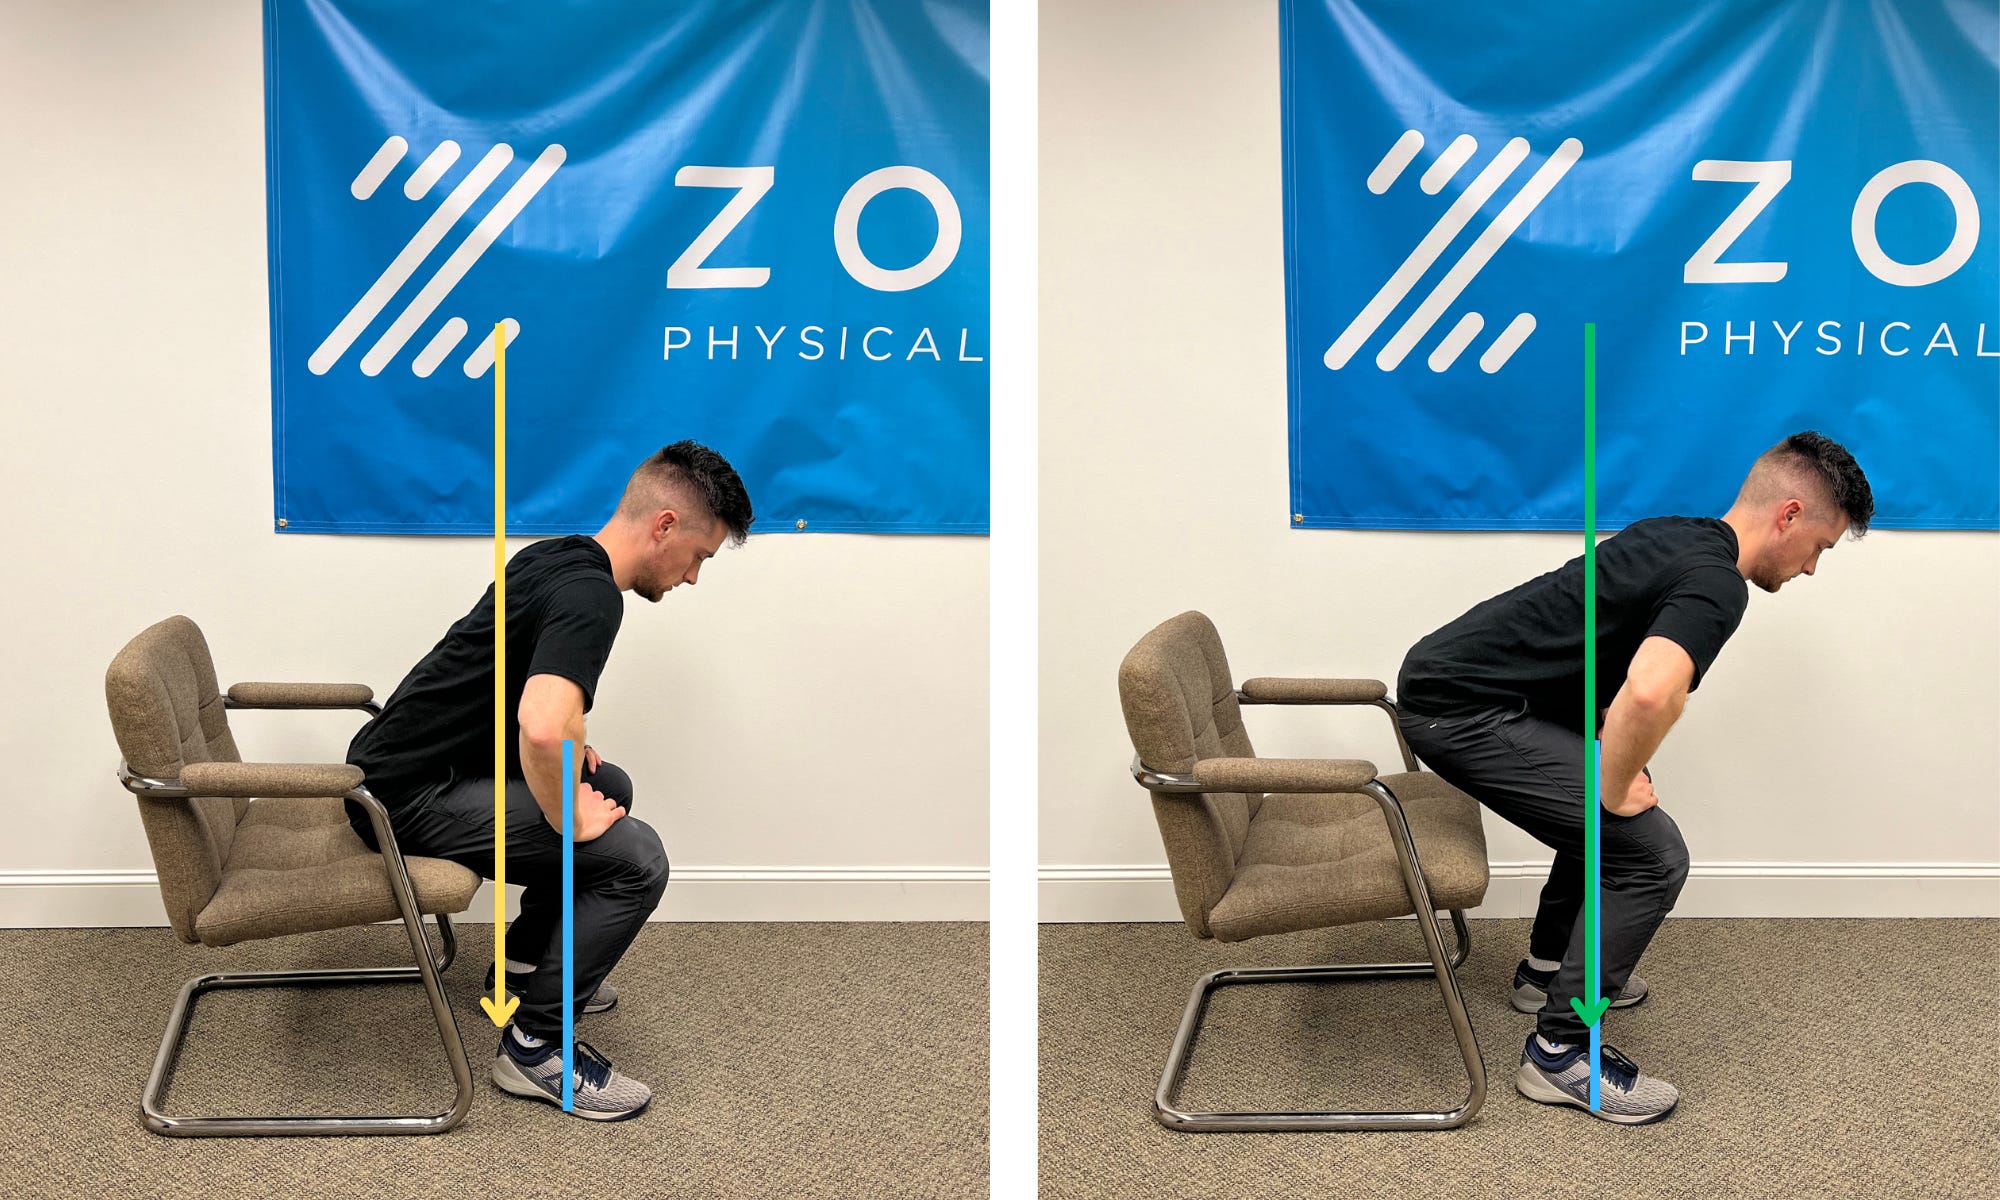
#2: You Better Believe It. You’re Also Going to Learn How to Get up and down from the Floor.
Now that you get out of bed like your wise and athletic grandma, it’s time to learn how to get up and down from the floor. If you never purposefully find yourself resting on the floor…you should.
The principles here are the same. You want to keep your hips square over your shoulders as much as possible. This means you’re avoiding unnecessary spine rotation. We also want to keep the core lightly braced throughout.
Explaining the whole process would be too wordy so I’ll rely on another video.
This is a movement I often have to tweak depending on each patient. Sometimes I have to adjust their back position, how they brace their core, which direction they roll, or completely change one or more of the steps to make it painless.
Or they might not have the strength to do the movement properly. So we implement a change, like pushing up from the chair/couch, to compensate temporarily until their strength improves.
You can do the same on your own. If you perform the movement exactly like I laid out and you have pain at a certain position or movement, repeat with little adjustments until you can make it pain-free.
Just like last week, if this proves to be impossible, just set up a call with me. These kinds of things are best done individually!
#3: How to Sit down and Stand Up
You had to know this was coming. If you’re going to learn how to get out of bed and off the floor, you also need to learn how to sit and stand athletically.
When standing up out of a chair we all tend to make two common mistakes.
We don’t scoot far enough forward. Scoot forward in your chair until just your bottom is on the chair, not your thighs. To successfully stand, your body weight will need to be over the middle of your feet. Scooting forward in your chair makes it easy to get your center of mass over your feet. The further forward your feet are in front of you, the harder the movement will be.
Trying to stay upright. If you try to keep your trunk perfectly straight up, your center of mass will again be behind your feet and you’ll have a hard time getting up. You need to hinge forward at your hips which means your trunk will come forward. This gets your body mass over your feet and allows your powerful glutes and hamstrings to do all the work. A common saying you’ll hear to remind you to do this is, “Nose over toes.”
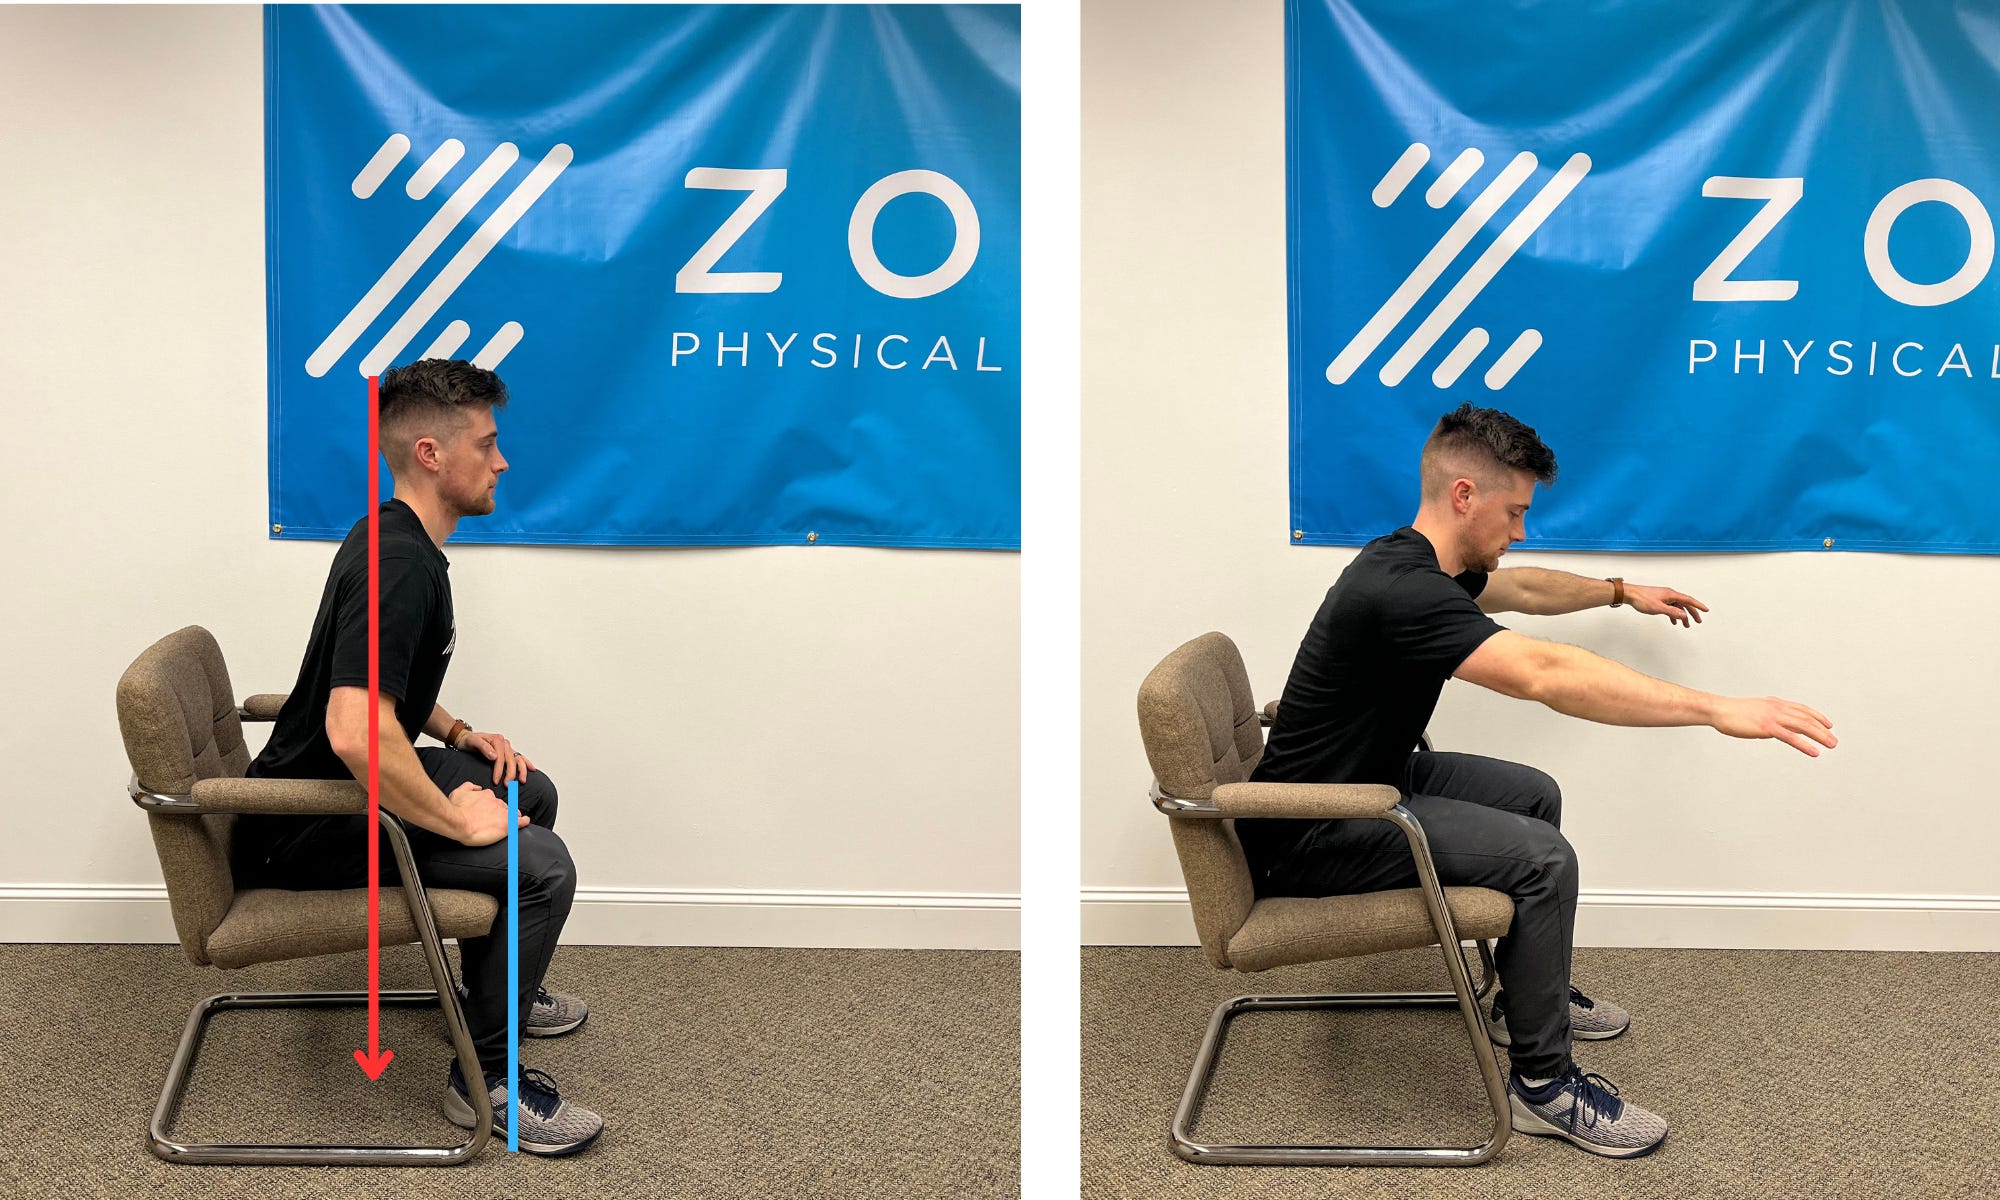
Follow those two simple pieces of advice and you’ll be hopping up from the chair like a teacher who just sat on a thumbtack.
If you want to add a little more oomph to your stands to impress your cubicle mates you can incorporate the following: angle your feet out 20-30 degrees, screw your feet into the ground, push your knees out hard, brace your core, pull your shoulders down and tight, and up you pop.
Sound like a lot?
We will go full into the details on those steps one day when we cover how to squat, specifically low bar squat. If those steps sound foreign but you regularly squat for exercise…you’ll want to stay tuned for that article to come.
#4: Opening a Door
I’m guessing opening a door is something you’ve NEVER thought about, and certainly not something you’ve practiced.
We’ve all had that moment when we attempt to pull open a door and we lose the battle. The door was heavy, the hinges were stiff, and we weren’t ready for it. You squeeze and bump your way through the small opening you managed to muster. Hopefully, nobody was watching.
We generally approach opening a door pretty lazily and rely on mostly arm strength and rotating our backs to power the movement. When you use your back to open doors all day you’re withdrawing from your physical capacity bank again.
Let’s take on this door like the athlete you are:
Step up to that door with your inside foot behind you a little to make room for the door and to give you a good anchoring point.
Brace your core (like we’ve practiced) and screw your feet into the ground like you’re a 2nd grader about to play tug-o-war.
Put your inside hand on the door handle and grip it hard, like you’re trying to indent your fingers into the handle.
Place your outside hand against the door frame and push your body weight through that hand and into the frame.
Whenever you need to push or pull with one hand, you can produce more stability and take A LOT of pressure off the spine by counterbalancing the force with the other hand. In this case, we push against the frame as we pull on the door. With laundry, you pull the clothes with one hand while using your other hand to push against the washer. There are many examples where you can apply this principle.
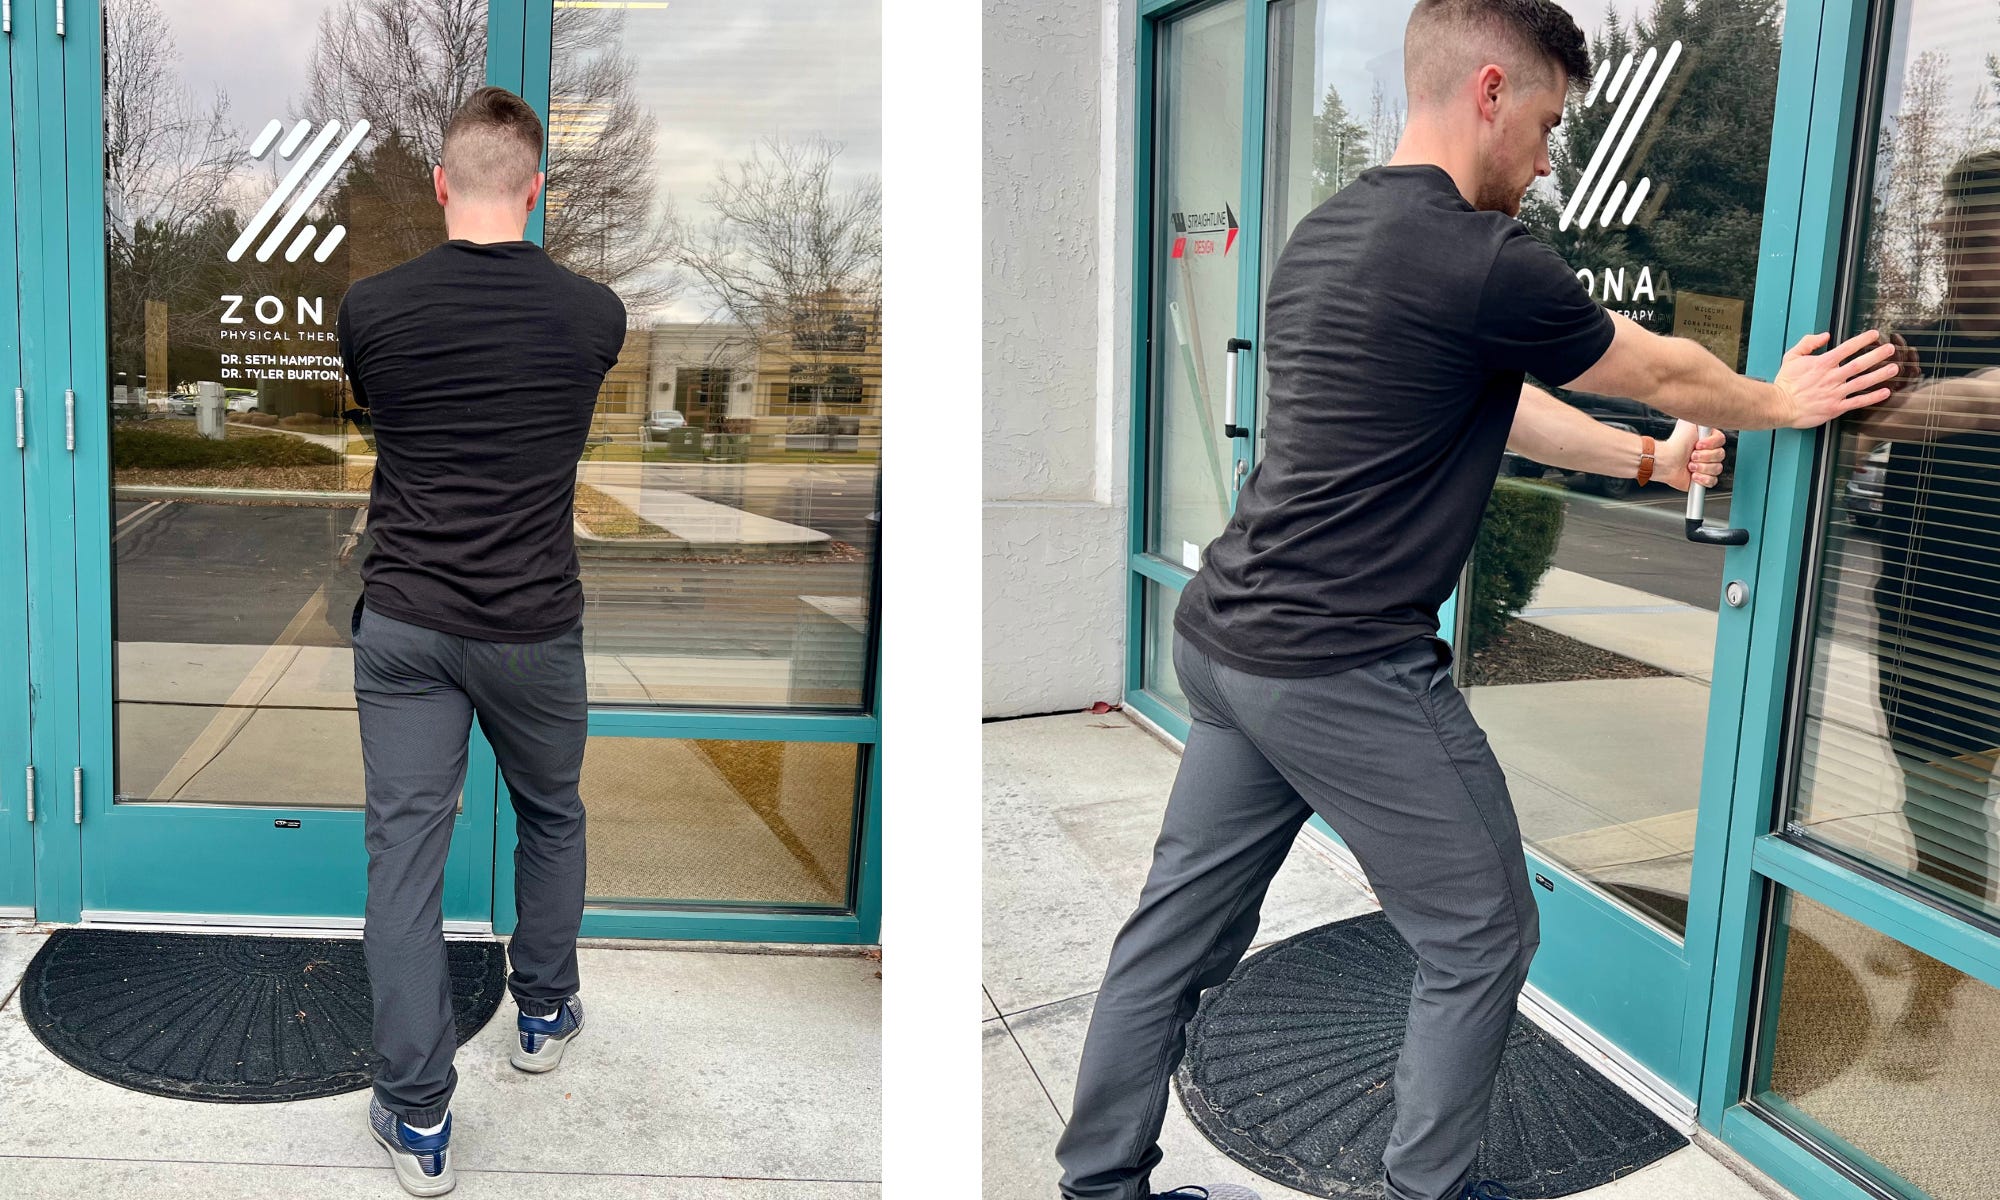
The more you do this, the more natural you’ll feel and be able to make it look. People won’t think you look odd. Rather, they will notice that you owned that heavy door while they try to shimmy through the small gap they barely made during their losing battle with the hinges. You’ll be the talk of the store. “Did you see that lady open the front door? She must be really strong.” Just you wait and see.
Adding up the 1% Improvements
I know these things sound so small. How in the world could perfecting these easy movements make any difference in your back pain or athleticism?
The story of the early 2000s British cycling team has now been well documented and referenced, most famously in James Clear’s book, “Atomic Habits.”
They focused on simple, easy changes to marginally improve their performance. When these changes multiplied and were repeated daily, it catapulted their performance from lackluster to dominant.
I see this play out time and time again with my patients. Every patient I work with on these movements gets a chuckle in the moment and I always join in on the jokes and laughter. But they’re grinning ear to ear when they report how good their back feels just days or weeks later.
When we focus on perfecting the movements we repeat A LOT every day, we get big improvements with a pretty quick turnaround.
Make your most repeated movements intentional and athletic. Watch your pain resolve and your athleticism rise.
If you want to keep following this short series on using and training the core, hop on board for the weekly thrill in your inbox!
If you know anyone else in need of an adrenaline rush of amazing education on performance training and getting out of pain, you can bother them with another email to their inbox, too.